How to Add Dynamic Order Bumps to Checkout Page
Order bumps are a powerful tool to increase the average order value by offering customers a special, one-time offer at the checkout page. In this article, we will guide you through the process of adding order bumps to your sales funnel using SellKit. This feature can significantly enhance your sales strategy by encouraging customers to make an additional purchase with minimal effort.
Step 1: Access Your Funnel
- Log in to your SellKit dashboard.
- From the sidebar, select SellKit, then click on Funnels.
- Choose the funnel where you want to add the order bump and click on it.
Step 2: Navigate to the Checkout Step
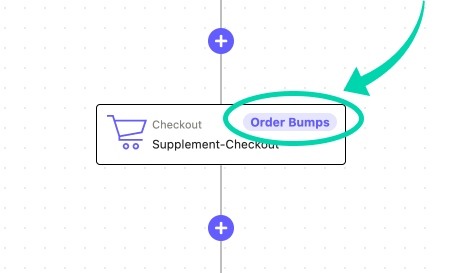
- In the funnel flow, locate the Checkout step.
- Click on the checkout step to access its settings.

Step 3: Access the Order Bump Settings
- In the checkout settings, you will see tabs for Design, Products, Optimization, and Bump. Click on the Bump tab to proceed with adding an order bump.
Step 4: Add a New Order Bump
- Click on the + Add order bump button to create a new order bump.

Step 5: Name and Design Your Order Bump
- A pop-up will appear asking you to enter a name for this order bump. Type in a descriptive name that relates to the offer, such as "Protein Order Bump".
- After naming, you'll be taken to a new set of tabs: Design, Product, and Conditions.
- Under the Design tab, set up:
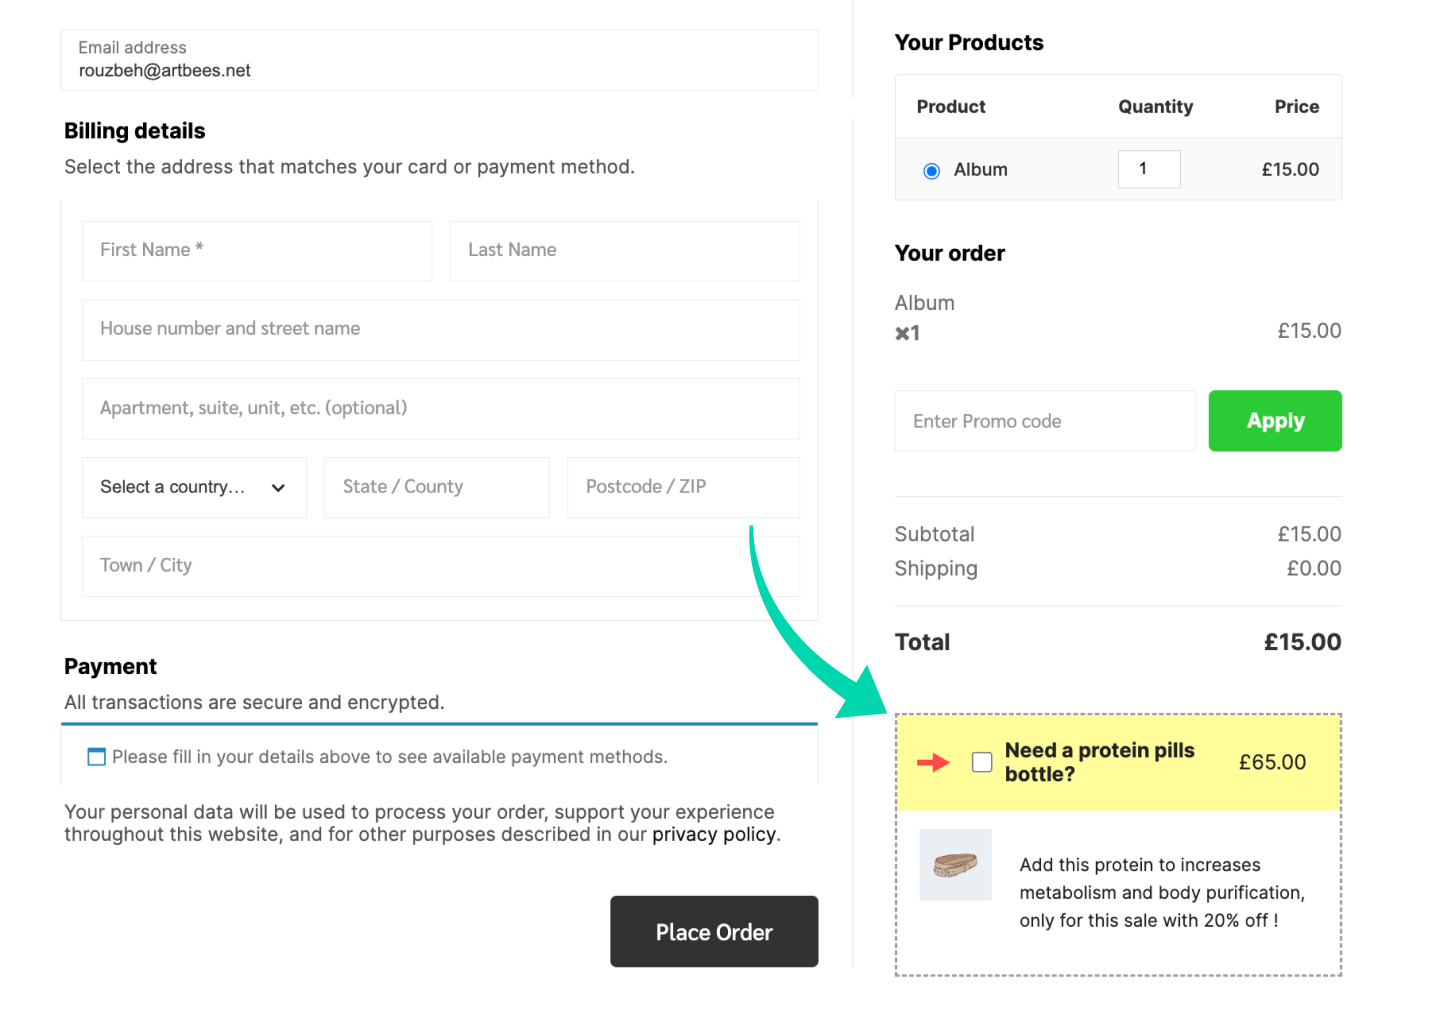
- Position: Decide where the order bump will be placed (e.g., "Below the order summary").
- Content: Write a compelling checkbox label and product description to entice customers.
Step 6: Select the Product for the Order Bump
- Switch to the Product tab.
- Click on + Add Product and select the product you want to offer as an order bump from your existing catalog.
Step 7: Set Conditions for the Order Bump
Order bumps in SellKit are dynamic. It means that they can be activated on specific situations or for specific customers. This greatly helps with personalizing the shopping experience for your customers as well we targeting your customers with effective marketing campaigns.
To make an order bump dynamic, simply specify criteria for when the order bump offer is shown, such as a minimum cart subtotal, ensuring it targets the right customers at the optimal time.
- Move to the Conditions tab.
- Use the + Add Condition button to set specific conditions under which the order bump will be triggered (e.g., "Cart Subtotal greater than $100").
Step 8: Save Your Order Bump
- After configuring the design, product, and conditions for your order bump, click on the Save button to apply the changes.
Step 9: Test the Order Bump
- Always test the order bump by previewing the checkout process to ensure it appears correctly and works as intended.
Need Help?
Contact our support team for further assistance.