How to Set Up Smart Notice
Smart Notices are strategic, customizable messages that appear at various stages of the customer journey within an e-commerce platform, designed to engage customers with relevant information or offers. These notices act as touchpoints that can guide and influence the customer's experience from initial interest to post-purchase.
Smart Notices serve as a powerful tool to not only increase conversion rates but also to build customer loyalty by providing a tailored shopping experience. They are particularly effective because they are triggered by specific customer actions or data, such as items in a cart, user location, time spent on site, or user behavior, ensuring that the message is relevant and timely.
Popular Examples of Checkout Notices
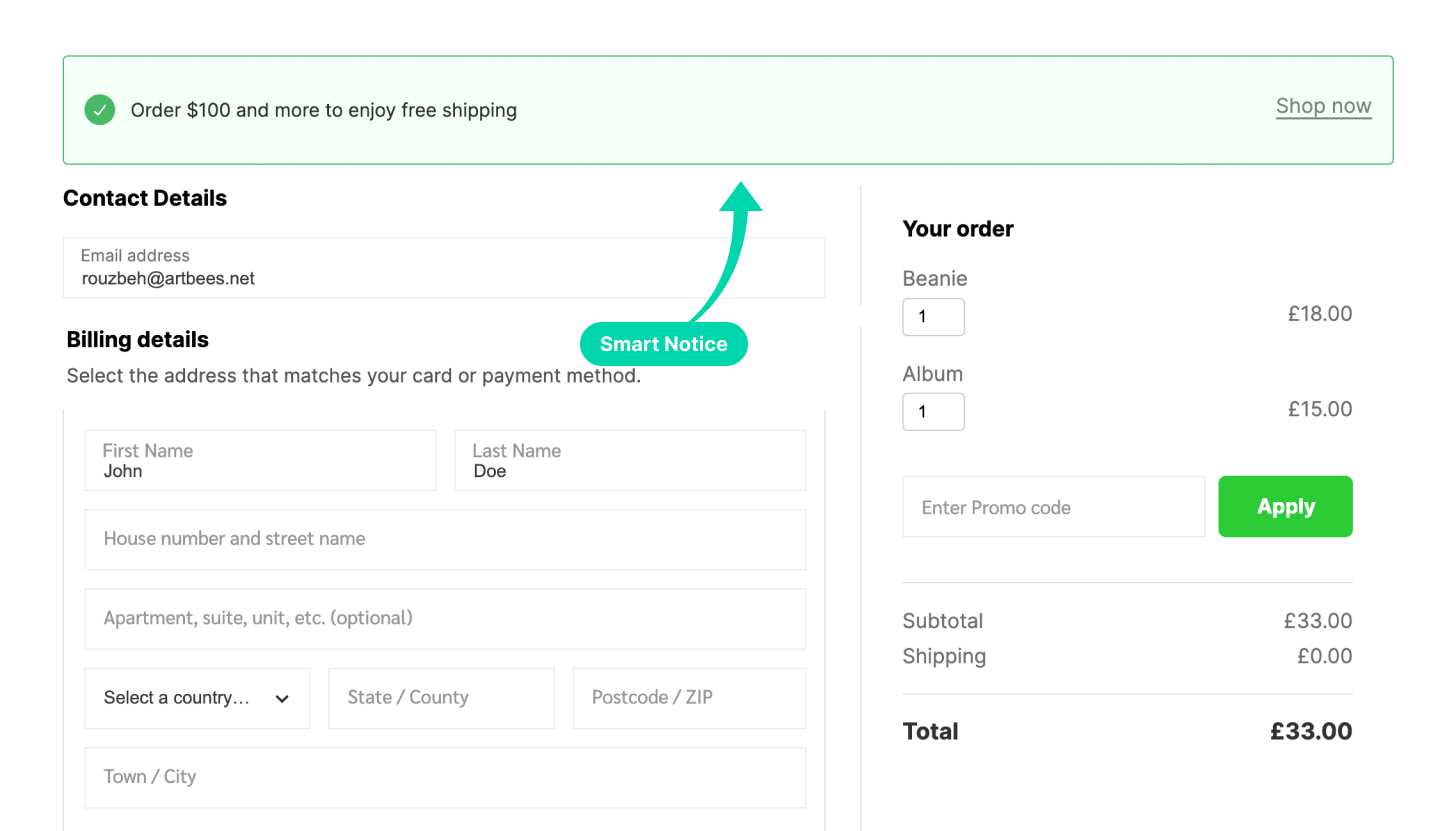
Cart-Based Promotion: This notice can be set up to appear when the customer has a certain number of items in their cart. It encourages customers to add more items to their cart to qualify for a free shipping offer, potentially increasing the average order value.
Location-Specific Offer: This notice can be displayed based on the visitor's country, providing a personalized experience. It's great for special promotions or region-specific sales, helping to target offers to the right market segment.
Upsell Opportunity: This notice is perfect for showing up on the 'Order Received' page or in the cart. It suggests additional, related products to customers who have already shown interest in a particular product type, capitalizing on the opportunity to increase sales through upselling.
Step 1: Access Smart Notices
- Log in to your WordPress dashboard.
- Navigate to the SellKit option on the left-hand side menu.
- Click on the Notices submenu under SellKit.

Step 2: Create a New Smart Notice
Click on the Add Smart Notice button to start creating a new notice.
Step 3: Configure Smart Notice Settings
You will be directed to the 'Create Smart Notice' page, which is divided into several sections:
Section 1: Name Your Notice
Assign a unique and descriptive name for your Smart Notice for easy identification.
Section 2: Set Display Conditions
Choose conditions under which the Smart Notice will be shown to customers. Click on + Add Condition to specify when the notice should appear.
Learn More: Using Conditions in SellKit
Step 4: Compose the Notice Content
Here you will craft the message that will be displayed. You can use the rich text editor to format your text and insert dynamic keywords that personalize the notice.
What are Dynamic Keywords?
Dynamic Keywords are variables that you can insert into your Smart Notices. When a notice is displayed to a customer, these variables are replaced with actual data relevant to that particular customer or their actions. For example, if you use the Dynamic Keyword for "Products in Cart", the notice will show the actual products that the customer has in their cart.
How to Use Dynamic Keywords
To use Dynamic Keywords in your Smart Notice:
- Navigate to the Message box where you compose the content of your notice.
- Click on the + Insert Dynamic Keyword button. This will bring up a list of available Dynamic Keywords, such as "Categories in Cart", "Remaining Subtotal Amount", "Time to Deadline", and others.
- Select the desired Dynamic Keyword from the list, and it will be inserted into your message content at the cursor's location.

🎥 Learn how to use dynamic keywords in action to drive more sales
Section 4: Determine Display Priority and Locations
- Set the priority if there are multiple notices. This determines which notice is shown first if more than one meets the display conditions.
- In next step, you'll specify where on your website, the Smart Notice should appear:
- Checkout
- Cart
- Catalog
- Product Single
- Order Received
- My Account
- Custom Location
Tick the box for each location where you want the notice to appear.
Final Step: Activation and Creation
- To make the Smart Notice go live immediately after creation, check the Activate this notice immediately after it is created box.
- Click the Create button to save and activate your Smart Notice.
Need help?
Need help configuring smart notices? Contact SellKit support team and we’ll be happy to assist.